个人网站/博客搭建教程
个人网站/博客搭建教程
AuroraEve前言
采用hexo框架文档 | Hexo
本博客是基于安知鱼主题官方文档 | 一个简洁、美丽的静态hexo主题这个主题搭建的。里面有详细的教程
这也是一篇基础的搭建教程Hexo博客搭建基础教程(一) | Fomalhaut🥝。我当初就是跟着这个入门的。部署到GitHub Page上一文带你使用Github page搭建自己的博客 | Pang-Blog|如何用 GitHub Pages + Hugo 搭建个人博客 · KrislinBlog
要部署到服务器上可以看这个教程用宝塔面板把Hexo部署到服务器 | 小明的部落格也可以看我下面的简易版教程
运营维护常用命令
添加相册集
1 | hexo new page 2025Yearbook |
更改设置
1 | --- |
PicSizer v4.9.3批量图片压缩软件,支持精确控制KB MB - 吾爱破解 - 52pojie.cn
【11.8更新】图片批量无损压缩 VIKY 3.4 - 吾爱破解 - 52pojie.cn
个人网站/博客搭建教程
环境部署
安装 Hexo 相当简单,只需要先安装下列应用程序即可:
在要安装博客的根目录空白处,按shift+鼠标右键。点击打开git bash。所有命令都是在这个里面执行的。
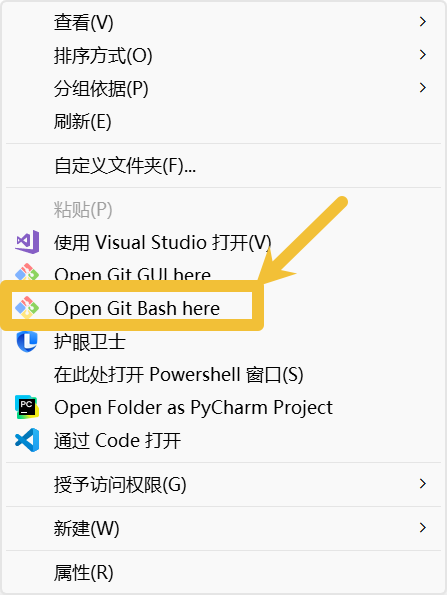
要注意这个里面复制和粘贴的快捷键和常规的不一样
所有必备的应用程序安装完成后,即可使用 npm 安装 Hexo。
1 | npm install -g hexo-cli |
然后在要创建博客的根目录局部安装 hexo 包。
1 | npm install hexo |
blog_AuroraEve3.0
之前以及部署好环境了
直接
1 | hexo init blog_AuroraEve3 |
打开 Hexo 根目录下的 config.yml, 找到以下配置项,把主题改为anzhiyu
1 | # Extensions |
安装 pug 和 stylus 渲染插件
1 | npm install hexo-renderer-pug hexo-renderer-stylus --save |
windows 复制/themes/anzhiyu/_config.yml此文件到 hexo 根目录,并重命名为_config.anzhiyu.yml
以后如果修改任何主题配置,都只需修改 _config.anzhiyu.yml 的配置即可。
启动blog
1 | hexo cl;hexo ge;hexo s |
最后更新于202503071050
到此带有安知鱼主题的hexo博客就以及搭建好了。剩下的是配置阶段。
目前博客只在本地部署。
可以选择部署到GitHub page上或者是自己的服务器上。
标签页配置
1 | hexo new page tags |
你会找到 source/tags/index.md 这个文件
修改这个文件: 记得添加 type: "tags"
1 | --- |
分类页配置
1 | hexo new page categories |
你会找到 source/categories/index.md 这个文件
修改这个文件: 记得添加 type: "categories"
1 | --- |
内置阿里图标库:https://www.iconfont.cn/collections/detail?cid=44481
服务器选择
2025-云服务器专区 京东云 阿里云 腾讯云 配置最新价格表 与 官方活动地址.xlsx
部署到服务器
用宝塔面板把Hexo部署到服务器 | 小明的部落格
评论区搭建
【Vercel】Twikoo | 为你的HEXO加入评论系统 – 夜梦星尘の折腾日记
HEXO系列教程 | 在Butterfly主题中使用评论系统twikoo – 夜梦星尘の折腾日记
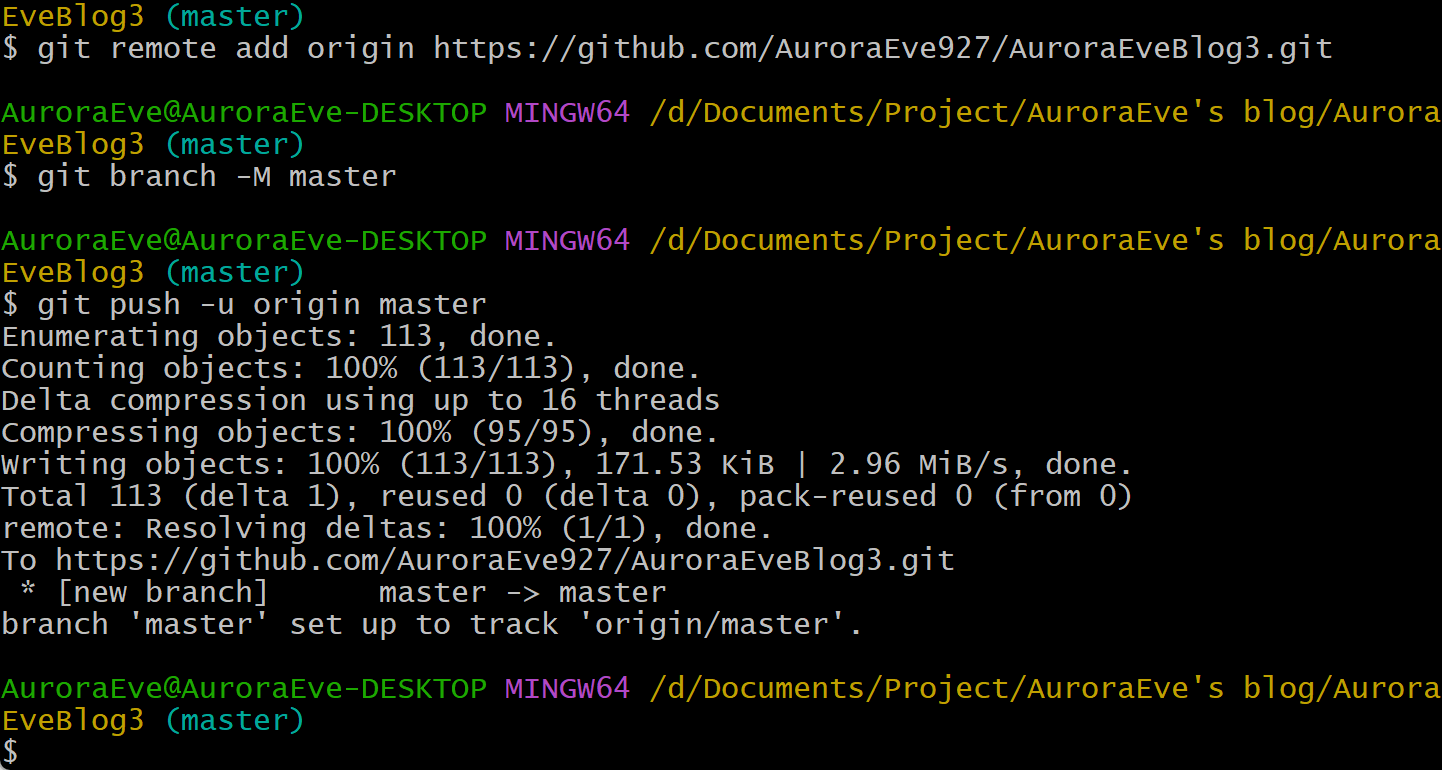
上传到GitHub
三步教你在将项目上传github_哔哩哔哩_bilibili
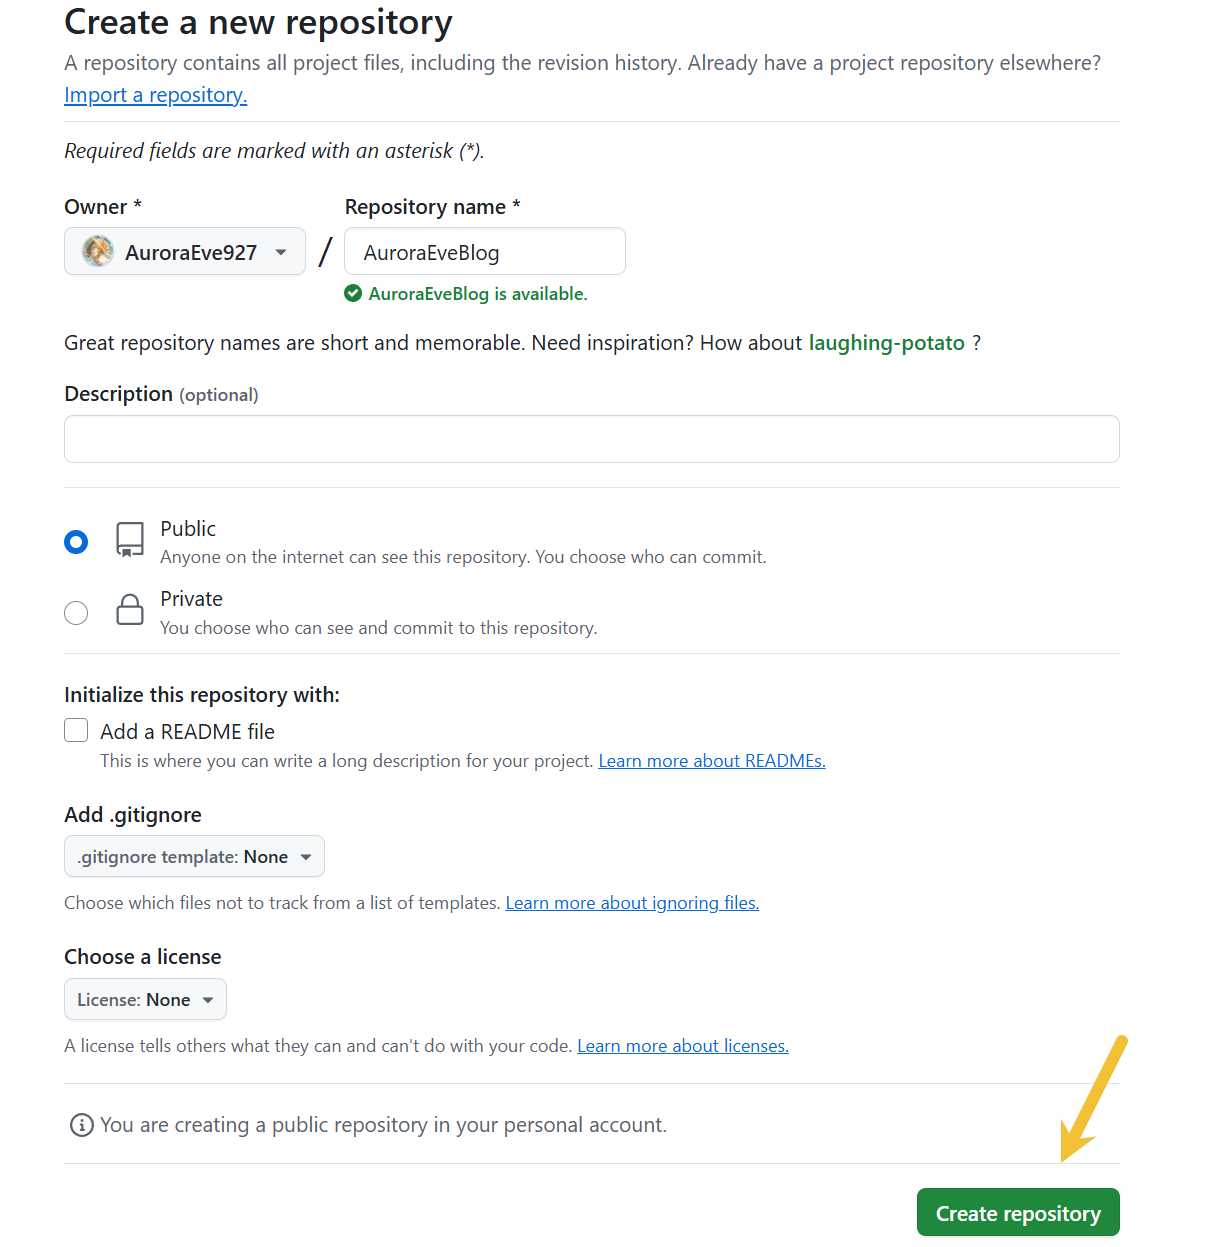
创建仓库
参考如下代码
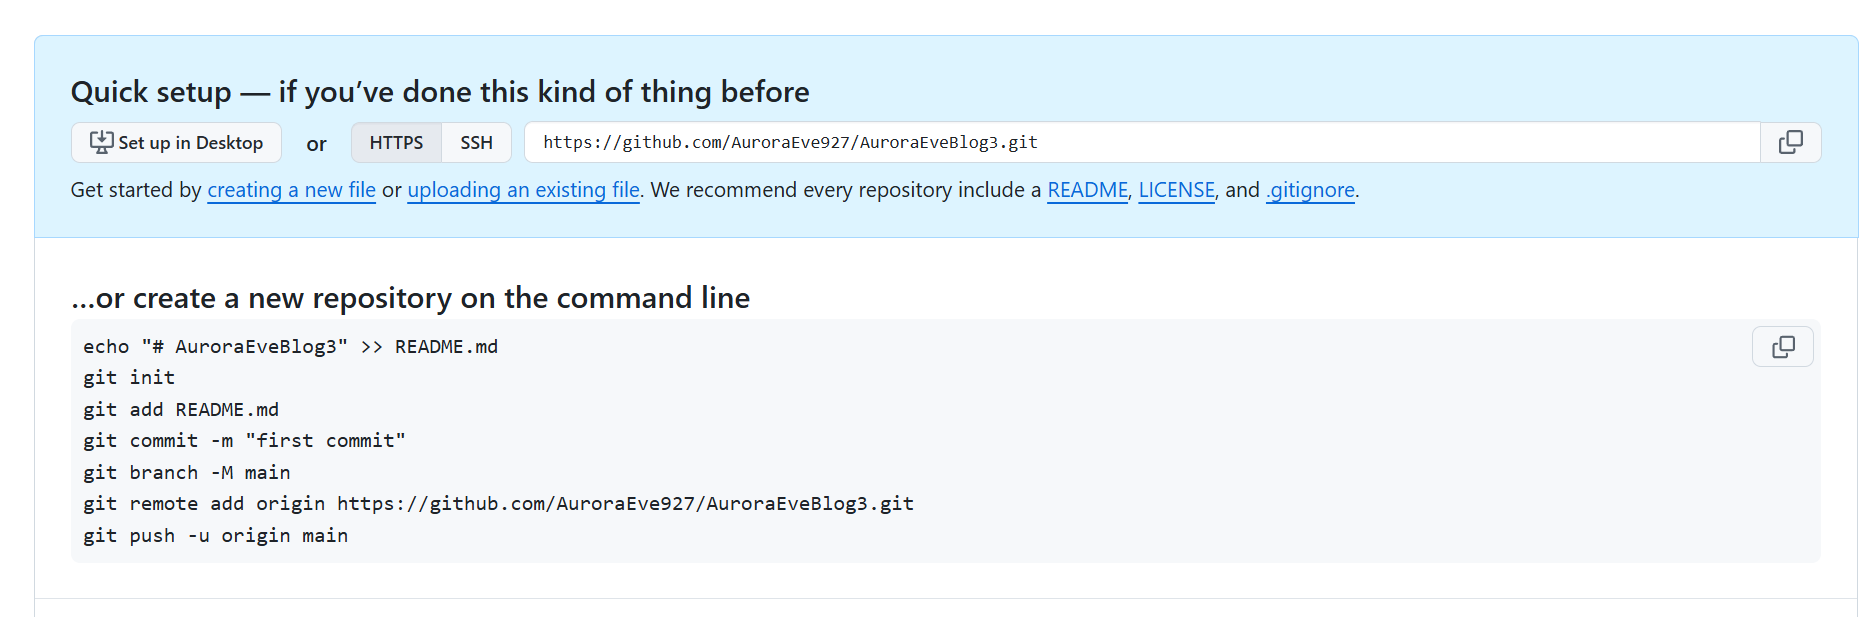
1 | git init |
这样就成功部署了
遇到的问题
🧠 问题背景总结
你在 Hexo 博客项目中使用了一个主题目录 themes/anzhiyu,这个目录本身是一个 独立的 Git 仓库(即“嵌套仓库”或“子模块”),当你执行 git add . 时 Git 给出如下提示:
You’ve added another git repository inside your current repository…
这会导致以下问题:
- Git 不会把
anzhiyu目录里的所有文件真正加入主仓库; - 远程仓库无法正确识别或下载该主题内容;
- 别人
git clone后无法看到完整主题内容,必须另外处理子模块。
✅ 解决目标
不使用子模块链接,直接把
themes/anzhiyu文件夹及其全部内容当作普通文件夹保存进仓库中。
🛠️ 解决步骤(适用于所有嵌套 Git 仓库目录)
✅ Step 1. 删除子仓库的 Git 跟踪信息
1 | bash |
这个 .git 是主题目录内部的 Git 仓库信息,我们需要删掉它才能让 Git 正确追踪其中文件。
✅ Step 2. 如果之前被当作子模块添加,先从 Git 缓存中移除它
1 | bash |
这一步把它从 Git 的索引中删除(不影响实际文件),避免 Git 继续当它是子模块。
✅ Step 3. 删除 .gitmodules 文件(如果存在)
1 | bash复制编辑rm -f .gitmodules |
这些文件记录子模块信息,我们不需要了。
✅ Step 4. 重新添加整个主题目录为普通文件夹
1 | bash复制编辑git add themes/anzhiyu |
✅ Step 5. 推送到远程仓库
1 | bash |
🎁 最终效果
themes/anzhiyu作为普通目录被完整纳入 Git 管理;- 不需要
git submodule操作,别人一git clone就能直接用你的博客; - 不再出现 “warning: adding embedded git repository” 提示;
- 更加易于部署、迁移、打包分享。
图床使用
由于图片会占用较多的服务器资源。
所以图片一般都是先上传到图床上面,然后使用链接访问的。可以参考这篇教程Hexo+Typora处理博客图片 - SFZhang
我使用的是去不图床 - 杜老师说旗下图片外链平台
这是markdown插入图片的代码。前面是图片的名字,后面是对应的url链接。
1 |  |
也可以直接上传到图床,然后用这个命令显示图片。
后续优化
添加站点地图sitemap
1 | npm install hexo-generator-sitemap --save |
打开 Hexo 根目录下的 config.yml, 添加以下配置项
官网上的配制文件有问题
用下面这个
1 | sitemap: |
hexojs/hexo-generator-sitemap: Sitemap generator for Hexo.
添加RSS功能
1 | npm install hexo-generator-feed --save |
如下配置
1 | feed: |
主题目录配置文件
在 butterfly 主题目录下的_config.yml 文件内添加配置内容:
1
rss: /atom.xml
在_config.yml 文件中找到 social settings 项,添加如下内容。(这样主页就能正确显示 RSS 图标了)
1
fas fa-rss: https://你的域名地址/atom.xml
hexojs/hexo-generator-feed: Feed generator for Hexo.
Hexo butterfly 主题添加 RSS 插件 | 面具熊小屋
hexo-abbrlink(我还没安装,其实用处不大)
可以把链接 permalink 转为数字的插件,配置容易,生成时自动转为数字。
ohroy/hexo-abbrlink: create one and only link for every post for hexo
哔哩哔哩视频适配
在
[BlogRoot]\source\css\custom.css自定义样式的文件中引入如下代码(这是我的,你可以自行微调):1
2
3
4
5
6
7/*哔哩哔哩视频适配*/
.aspect-ratio {
position: relative;
width: 100%; /* 设置容器宽度为父元素宽度的100% */
padding-bottom: 56.25%; /* 保持16:9的宽高比(75%对于4:3,这里用56.25%对应16:9)*/
overflow: hidden; /* 隐藏超出容器的内容 */
}1
2
3
4
5
6
7
8
9
10
11
12
13
14
15
16/*哔哩哔哩视频适配*/
.aspect-ratio {
position: relative;
width: 90%; /* 设置容器宽度为父元素宽度的100% */
height: auto;
padding-bottom: 75%; /* 保持16:9的宽高比(75%对于4:3,这里用56.25%对应16:9)*/
margin: 3% auto;
text-align: center;
}
.aspect-ratio iframe {
position: absolute;
width: 100%;
height: 86%;
left: 0;
top: 0;
}直接复制插入你的
md文章就行,修改里面的aid为你视频的AV号:1
2
3
4
5
6
7
8
9
10
11<div align=center class="aspect-ratio">
<iframe src="https://player.bilibili.com/player.html?aid=474023258&&page=1&as_wide=1&high_quality=1&danmaku=0"
scrolling="no"
border="0"
frameborder="no"
framespacing="0"
high_quality=1
danmaku=1
allowfullscreen="true">
</iframe>
</div>
获取aid号

1 | <iframe src="//player.bilibili.com/player.html?isOutside=true&aid=114391404054851&bvid=BV13RLizjEmS&cid=29582164737&p=1" scrolling="no" border="0" frameborder="no" framespacing="0" allowfullscreen="true"></iframe> |
上面的aid就是